以阿里云 OSS 为例,主要实现功能是根据文本上传文件
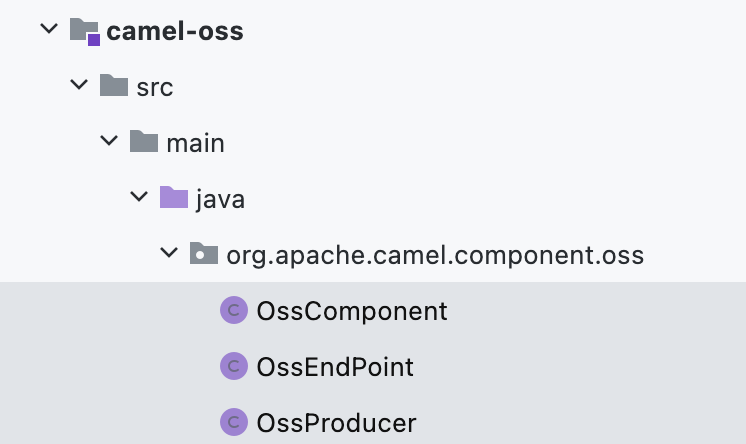
创建组件相关文件
整体目录如下
1
2
3
4
5
6
7
8
9
10
11
12
13
14
15
16
17
18
19
20
21
22
23
24
25
26
27
28
29
30
31
32
33
34
35
36
37
38
39
40
41
42
43
44
45
46
47
48
49
50
51
52
53
54
55
56
57
| public class OssComponent extends DefaultComponent {
@Override
protected Endpoint createEndpoint(String uri, String remaining, Map<String, Object> parameters) throws Exception {
OssEndPoint endPoint=new OssEndPoint(uri,this);
return endPoint;
}
}
public class OssEndPoint extends DefaultEndpoint {
public OssEndPoint(String uri, OssComponent component) {
super(uri, component);
}
@Override
public Producer createProducer() throws Exception {
return new OssProducer(this);
}
@Override
public Consumer createConsumer(Processor processor) throws Exception {
throw new UnsupportedOperationException("You cannot receive messages from this endpoint");
}
}
public class OssProducer extends DefaultProducer {
public OssProducer(OssEndPoint endpoint) {
super(endpoint);
}
@Override
public void process(Exchange exchange) throws Exception {
putObject(exchange.getIn().getBody().toString(),
exchange.getIn().getHeader("fileName").toString());
}
private void putObject(String content,String fileName)
{
String endpoint = "https://oss-cn-hangzhou.aliyuncs.com";
String accessKeyId = "xxx";
String accessKeySecret = "xxx";
OSS ossClient = new OSSClientBuilder().build(endpoint, accessKeyId, accessKeySecret);
PutObjectRequest putObjectRequest = new PutObjectRequest("curryzxh", fileName, new ByteArrayInputStream(content.getBytes()));
ossClient.putObject(putObjectRequest);
ossClient.shutdown();
}
}
|
以上功能实现了一个最简化的文件上传功能
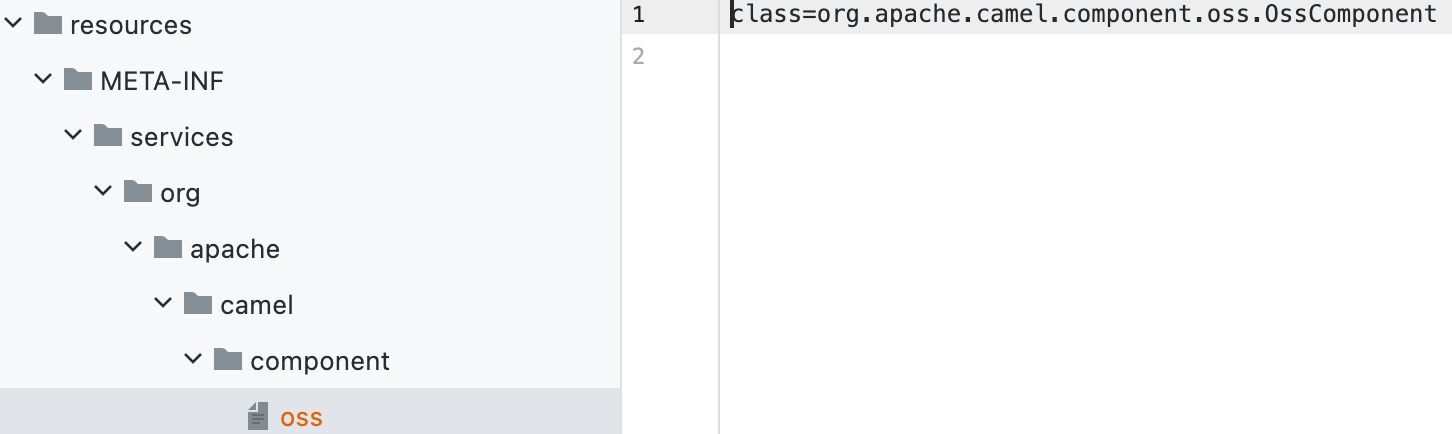
配置组件 SPI 路径
上面功能开发完后还无法使用,需要为组件添加配置路径,可以让 camel 识别到
组件默认路径为/META-INF/services/org/apache/camel/component,配置如下
oss 就是组件的简写名称
组件测试
1
2
3
4
5
6
7
8
9
10
11
12
13
14
| @Test
public void test() throws Exception {
CamelContext context=new DefaultCamelContext();
OssComponent component= (OssComponent)context.getComponent("oss");
Endpoint endpoint=component.createEndpoint("oss:home");
Exchange exchange=endpoint.createExchange();
Message message=new DefaultMessage(exchange);
message.setHeader("fileName","testName");
message.setBody("testMsg");
exchange.setIn(message);
endpoint.createProducer().process(exchange);
}
|
以上就完成了一个最基础的组件开发
组件和端点注解
camel 提供了注解可以帮助简化开发,可以通过注解自动生成配置文件,在使用注解之前,需要配置 camel 提供的插件才能生效
camel-component-maven-plugin
该插件会根据注解自动生成配置文件
https://camel.apache.org/manual/camel-component-maven-plugin.html
1
2
3
4
5
6
7
8
9
10
11
12
13
14
15
16
| <plugins>
<plugin>
<groupId>org.apache.camel</groupId>
<artifactId>camel-component-maven-plugin</artifactId>
<version>${camel-version}</version>
<executions>
<execution>
<id>generate</id>
<goals>
<goal>generate</goal>
</goals>
<phase>process-classes</phase>
</execution>
</executions>
</plugin>
</plugins>
|
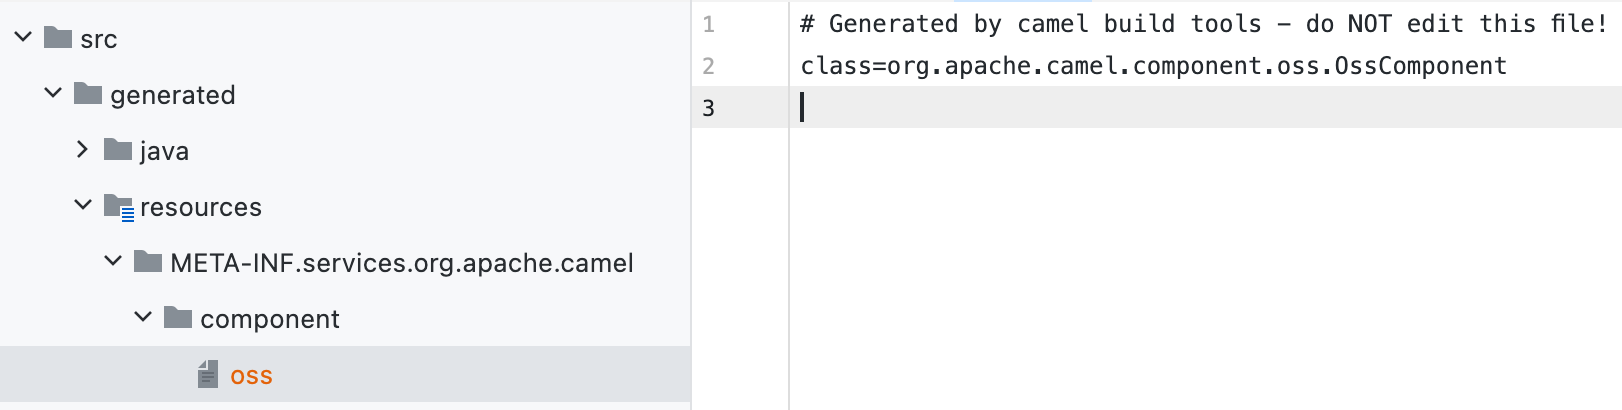
@Component
支持自动生成组件的配置路径
1
2
3
4
5
6
7
8
9
| @Component("oss")
public class OssComponent extends DefaultComponent {
@Override
protected Endpoint createEndpoint(String uri, String remaining, Map<String, Object> parameters) throws Exception {
OssEndPoint endPoint=new OssEndPoint(uri,this);
return endPoint;
}
}
|
生成后的文件如下
其他注解
| @UriEndpoint |
指定使用@UriParam和/或@UriParams注释对端点进行注释。还指定在生成的文档和其他信息中使用的默认方案。 |
| @UriParam |
用于标注参数值;通常在 Camel 的 URI 字符串中通过 ?foo=bar 语法指定。目前仅用于字段声明,但将来也可用于 setter 方法。如果未指定名称,则使用字段/设置器属性的名称。 |
| @UriParams |
指定一个字段是一个或多个配置参数的嵌套对象;那么这个字段的类应该用一个或多个@UriParam或@UriParams注解来注解 |
| @Metadata |
用于特殊情况以提供附加信息。 |
url 参数支持
我们在 OssEndPoint 添加了一个 bucket 属性,在 url 中动态传入 bucket 参数
- 使用 UriParam 注解定义要绑定的参数,label 表示 url 参数的 key
1
2
3
4
5
6
7
8
9
10
11
| @UriEndpoint(firstVersion = "1.0.0", scheme = "oss", title = "oss", syntax = "oss:name",
category = { Category.ENDPOINT })
public class OssEndPoint extends DefaultEndpoint {
@UriPath(description = "Name of oss endpoint")
@Metadata(required = true)
private String name;
@UriParam(label = "bucket",description = "bucket")
private String bucket;
}
|
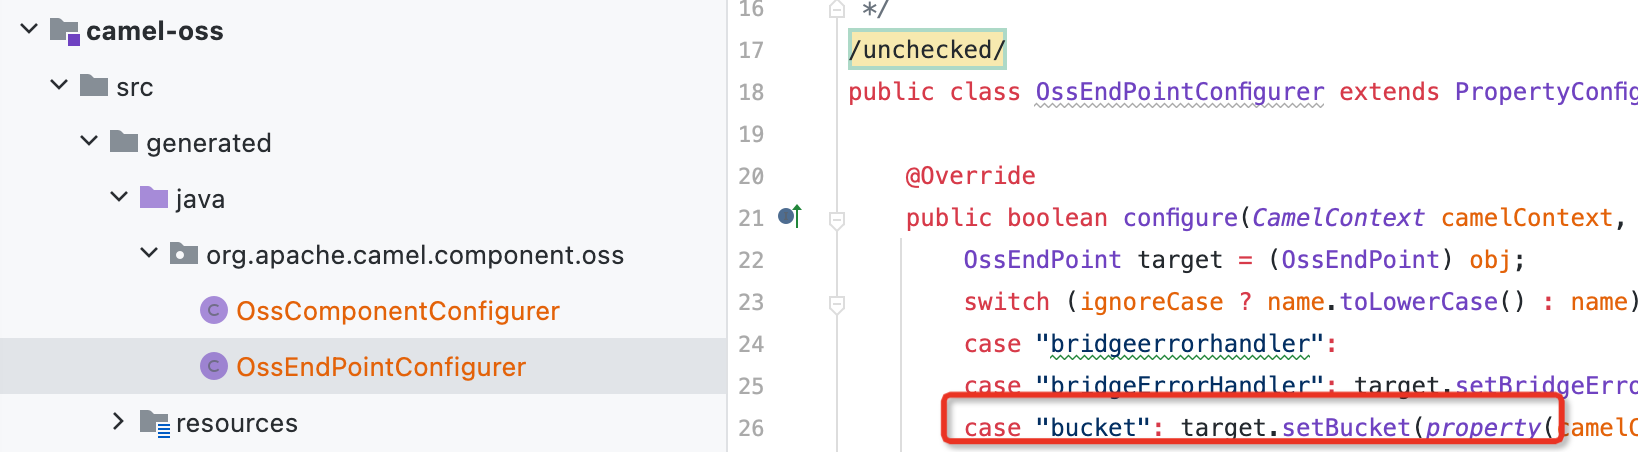
- 使用 camel-component-maven-plugin 生成文件
其会生成 2 个对应 component 和 endpoint 的 PropertyConfigurer 文件
- 属性 set 和 get 方法定义
由于 configure 方法中需要支持属性的 set 和 get 方法,否则无法编译通过,那么需要为 bucket 添加 set 和 get 方法
1
2
3
4
5
6
7
8
9
10
11
12
13
14
15
16
17
18
19
| @UriEndpoint(firstVersion = "1.0.0", scheme = "oss", title = "oss", syntax = "oss:name",
category = { Category.ENDPOINT })
public class OssEndPoint extends DefaultEndpoint {
@UriPath(description = "Name of oss endpoint")
@Metadata(required = true)
private String name;
@UriParam(label = "bucket",description = "bucket")
private String bucket;
public void setBucket(String bucket) {
this.bucket = bucket;
}
public String getBucket() {
return bucket;
}
}
|
- 配置参数
在创建 Endpoint 的时候,调用 setProperties 方法,设置 Endpoint 属性
1
2
3
4
5
6
7
8
9
10
| @Component("oss")
public class OssComponent extends DefaultComponent {
@Override
protected Endpoint createEndpoint(String uri, String remaining, Map<String, Object> parameters) throws Exception {
OssEndPoint endPoint=new OssEndPoint(uri,this);
setProperties(endPoint,parameters);
return endPoint;
}
}
|
- 入参测试
在 url 中传入 bucket 参数
1
2
3
4
5
6
7
8
9
10
11
12
13
14
| @Test
public void test() throws Exception {
CamelContext context=new DefaultCamelContext();
OssComponent component= (OssComponent)context.getComponent("oss");
Endpoint endpoint=component.createEndpoint("oss:home?bucket=curryzxh");
Exchange exchange=endpoint.createExchange();
Message message=new DefaultMessage(exchange);
message.setHeader("fileName","testName");
message.setBody("testMsg");
exchange.setIn(message);
endpoint.createProducer().process(exchange);
}
|